NuBloom’s Injection Guide

Step-By-Step for Safe and Confident Home Injection
At NuBloom, we believe your wellness journey should feel approachable and empowering. Whether you’re new to injections or just need a quick refresher, this guide will walk you through the basics of safe at-home medication administration.
Always follow the instructions provided by your clinician and prescription label. If anything in this guide differs from what your provider recommended, follow your provider’s directions first.
Before You Begin
Quick Prep (1–2 Minutes)
Before administering your injection:
- Wash or sanitize your hands thoroughly
- Use a clean, well-lit surface
- Confirm your medication name, dosage, and expiration date
- Gather your supplies:
- Medication vial
- New syringe and needle (or pen needle)
- Alcohol swabs
- Choose your injection site and rotate locations regularly
- Never reuse or share needles
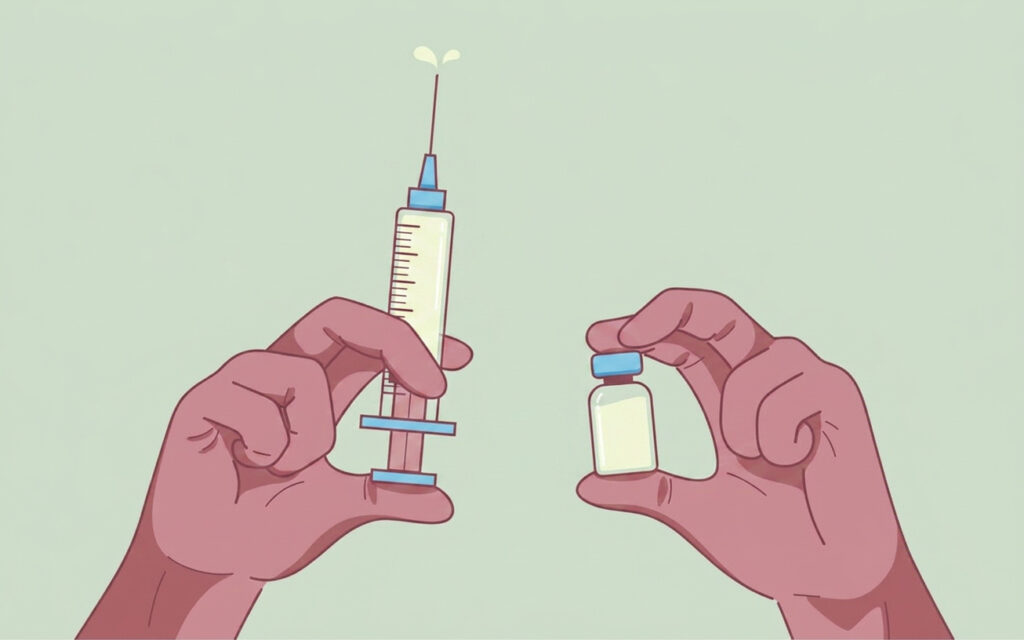
How to Give a Subcutaneous (SubQ) Injection
Subcutaneous injections are given into the fatty tissue just beneath the skin. Common injection sites include the abdomen, outer thigh, or back of the upper arm.
Step 1: Clean the Area
Use an alcohol swab to clean:
- The rubber stopper on your vial
- Your injection site
Allow the area to air dry completely before proceeding.
Step 2: Draw Your Dose
- Attach a new needle to the syringe
- Pull air into the syringe equal to your prescribed dose
- Insert the needle into the vial and push the air in
- Turn the vial upside down and slowly draw the medication to the correct measurement line
- Tap or flick the syringe gently to remove air bubbles if needed
Step 3: Pinch the Skin
Using your thumb and forefinger, gently pinch 1–2 inches of fatty tissue.
Step 4: Insert the Needle
Insert the needle quickly and smoothly at a 45–90° angle based on your clinician’s instructions and needle size.
Step 5: Inject the Medication
Press the plunger slowly and steadily until the medication is fully delivered.
Step 6: Remove & Dispose
Remove the needle carefully and dispose of it in an approved sharps container.
Never place loose needles in household trash.
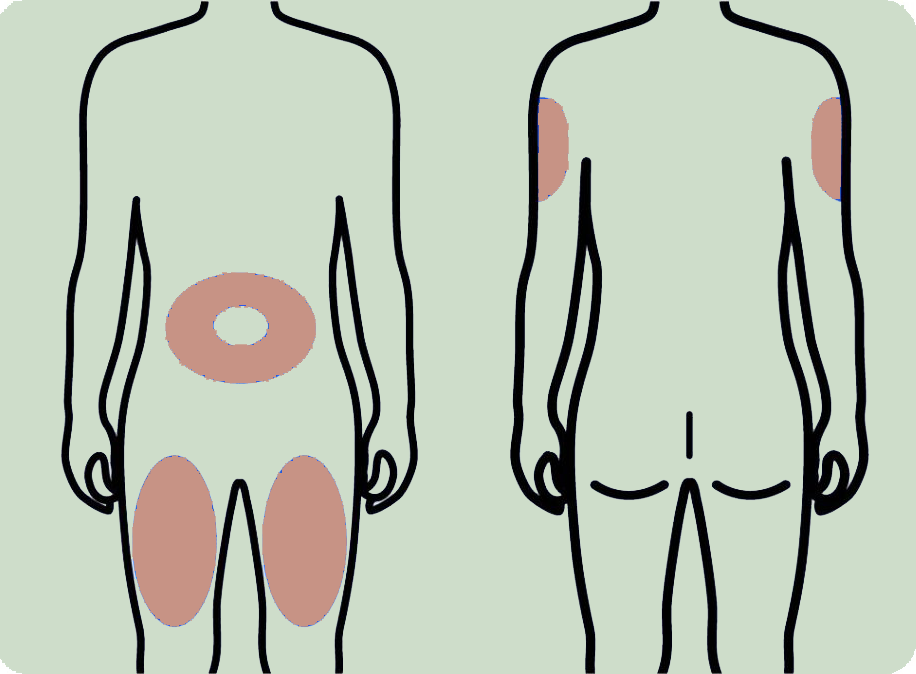
Injection Site Rotation
Rotating injection sites helps reduce irritation and improve comfort.
Recommended Areas
- Abdomen: Stay at least 2 inches away from the belly button
- Outer thigh
- Back of upper arm (if assisted)
Avoid Injecting Into:
- Bruised or irritated skin
- Scars or stretch marks
- Areas that feel tender or swollen
Intramuscular (IM) Injections
Some medications may be prescribed as intramuscular (IM) injections instead of subcutaneous injections. IM injections deliver medication directly into muscle tissue for absorption.
Only use this method if your provider has specifically instructed you to do so.
If you’re transitioning from SubQ injections, the medication itself may remain the same, but the needle setup and injection technique may differ.
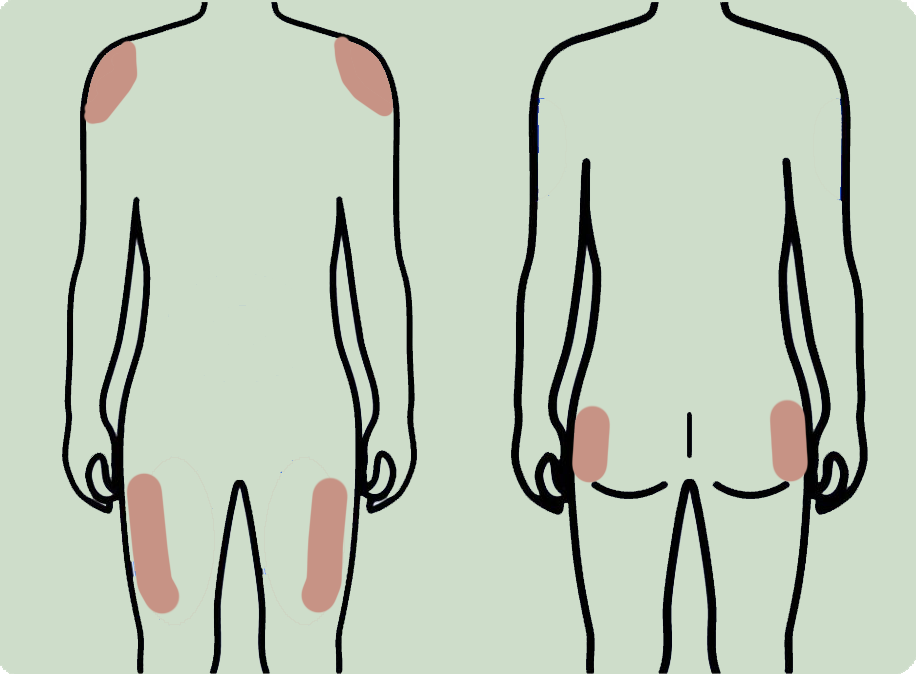
Common IM Injection Sites
Deltoid (Upper Arm)
Located 2–3 finger widths below the shoulder. Best for smaller-volume injections.
Vastus Lateralis (Outer Thigh)
Located in the outer middle section of the thigh between the hip and knee. One of the safest and easiest sites for self-injection.
Ventrogluteal (Hip)
Located on the side of the hip. Often preferred clinically due to lower risk of nerve injury.
The upper outer buttock area (dorsogluteal site) is less commonly recommended today because of its proximity to the sciatic nerve.
If you’re ever unsure whether your medication should be injected SubQ or IM, contact your provider before administering.
Medication Storage & Handling
- Follow the storage instructions on your prescription label
- Refrigerate only if instructed
- Never freeze medication
- Keep away from heat, moisture, and direct light
- Store out of reach of children and pets
Missed a Dose?
Follow the guidance on your prescription label or contact your care team before adjusting your schedule or doubling a dose.
When to Contact Your Provider
Reach out to your clinician if you experience:
- Increasing redness, warmth, or swelling at the injection site
- Drainage or severe irritation
- Severe pain or numbness
- Rash or hives
- Signs of an allergic reaction
- Trouble breathing (seek emergency care immediately)
For questions about dosing, timing, or injection technique, our team is here to help.
Clinical Support: Available through your NuBloom portal
Order & Shipping Questions: support@nubloom.com
How to Read Your Syringe
A Quick Guide for Peptides & GLP-1 Medications
If you’re new to peptide or GLP-1 injections, don’t worry — reading your syringe is simpler than it looks.
Step 1: Check Your Prescription Label
Your prescription label tells you exactly how many units to inject.
Example:
“Inject 20 units nightly”
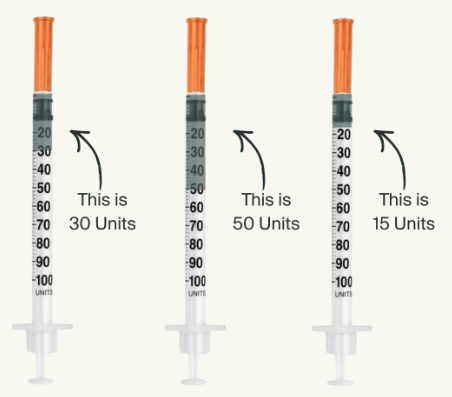
Step 2: Match the Number on Your Syringe
Your syringe is already labeled in units.
That means:
- 20 units = fill to the 20 line
- 30 units = fill to the 30 line
- 50 units = fill to the 50 line
Need 25 units? Simply fill halfway between 20 and 30.
No extra math required.
Avoid This Mistake
Some patients mistakenly fill the syringe to the 100-unit line thinking the syringe should always be full.
Only fill to the amount prescribed by your clinician.
- The 100-unit line represents a full syringe and is rarely the correct dose unless specifically prescribed.
Understanding Units vs. mg or mL
Your vial may list medication strength in mg or mL, but your prescription will usually tell you how many units to inject.
Good news:
Your pharmacy has already done the conversion for you.
Example:
- Vial strength: 5 mg/mL
- Prescription: Inject 0.25 mg
- Pharmacy conversion: 30 units
You simply draw the syringe to the 30-unit mark.
Pro Tip
Keep your medication vial inside the original prescription bottle whenever possible. It helps keep your medication:
- Clearly labeled
- Protected
- Easy to reference for dosing instructions
If you’re ever unsure about your dose or syringe markings, take a photo and reach out to our care team for guidance.
Disclaimer : This guide is intended for educational purposes only and is not a substitute for medical advice. Always use medications exactly as prescribed by your licensed clinician.
If you believe you are experiencing a medical emergency, call 911 or seek immediate medical attention.